Hi, Installing SSL Certificate is a pain for the newbie! It’s basically not easy to follow tasks since it’s instructions change for a platform to platform. While Lets Encrypt SSL Installing in cPanel is sort of easy to install since it can be installed via plugin under cPanel. The steps mentioned below required cPanel at the end and Domain name you want to install SSL Certificate must point it Nameservers to a web hosting server. If you find any error or difficulty while installing SSL Certificate then feel free to contact us 🙂
Here are steps to install Let’s Encrypt SSL Certificate via cPanel Plugin:
1 > First of all, make sure your domain is pointing to your web hosting server. If your domain is not pointing to the server then consider changing Nameservers first before following the next step.
2 > Search for Lets Encrypt Plugin in cPanel, To do that login to cPanel and Type “Lets Encrypt” in the search bar. The search result will bring up with plugin and now click on it!
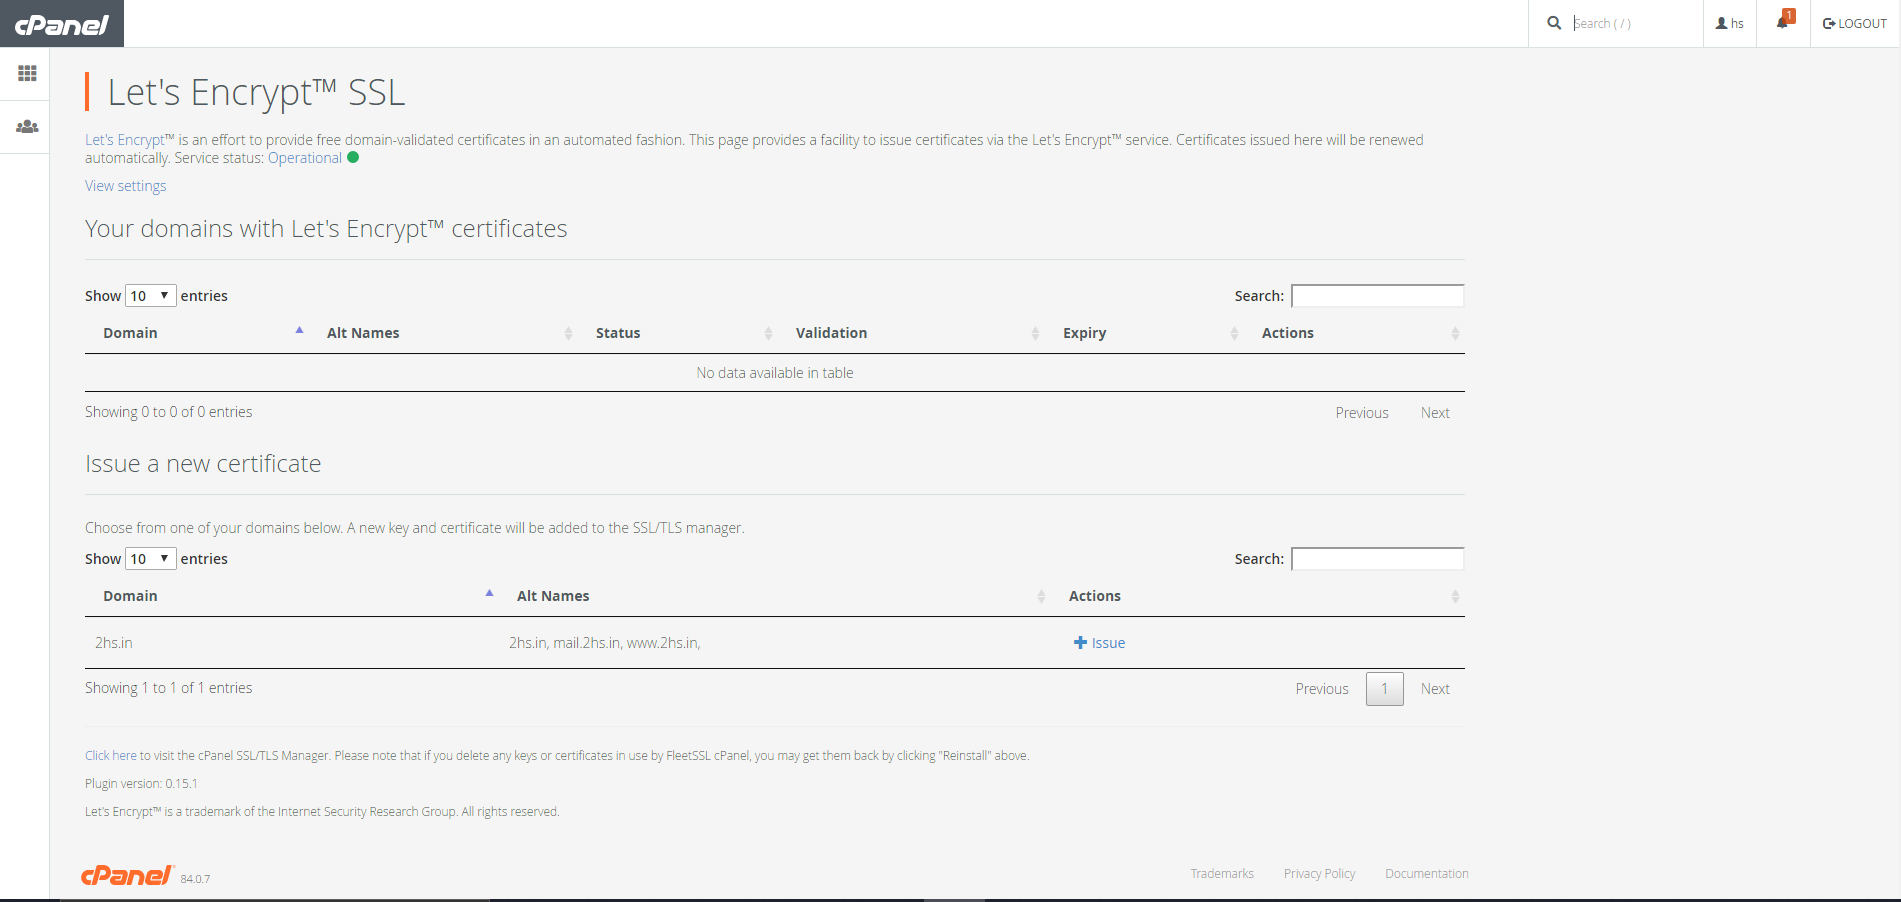
3 > You will find the following wizard after the loading page.

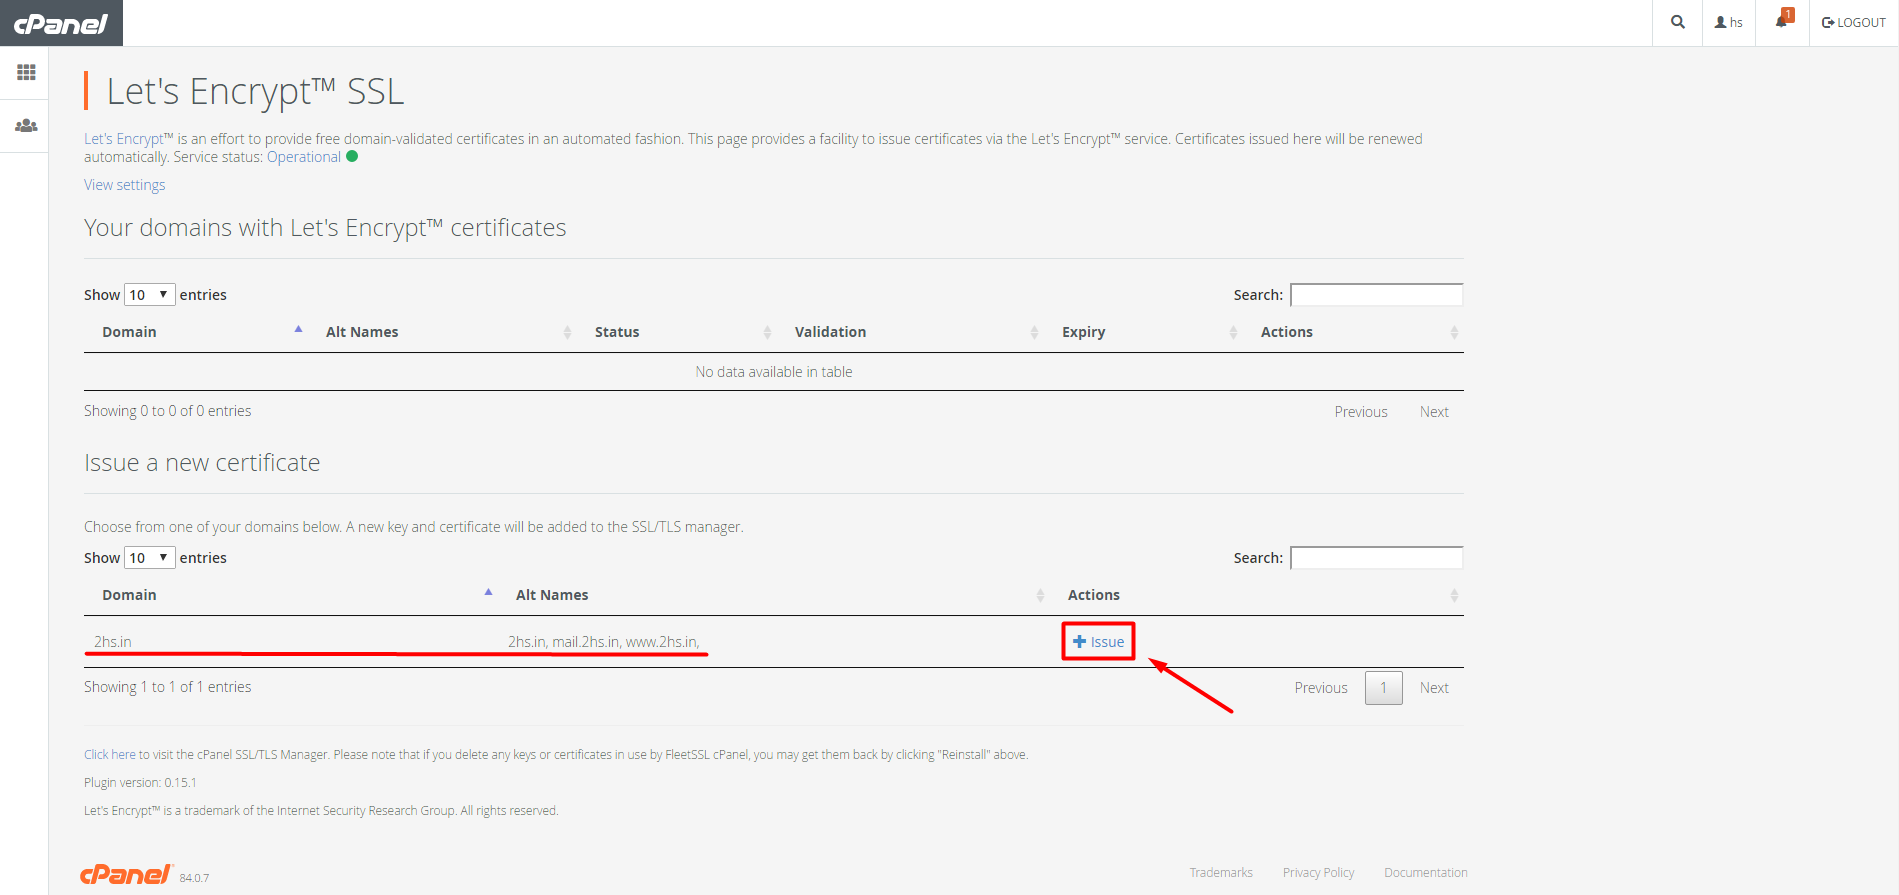
4 > Now Press the “+ Issue” button right next to the domain list.

5 > Now Press the “Issue” button at the bottom right of the screen.

6 > Pass the Next page with confirmation if required.
7 > After you have done this wizard will show you success message in the blue highlighted box.

Now this shows you have successfully installed Let’s Encrypt SSL Certificate! 😀 If you face any error message or any other issue, Feel free to contact our support team.
As always Happy Hosting 😉


Awesome it worked. Thanks
I get an error in green can it be because my severs are not yet pointed
You can solve that via whynopadlock.com
after message but my website is still showing notsecure
Hi,
If issue is not resolved, you can create a ticket from Client Area Account so our team can help you 🙂
Thanks for the information, i have successfully installed ssl, not it working