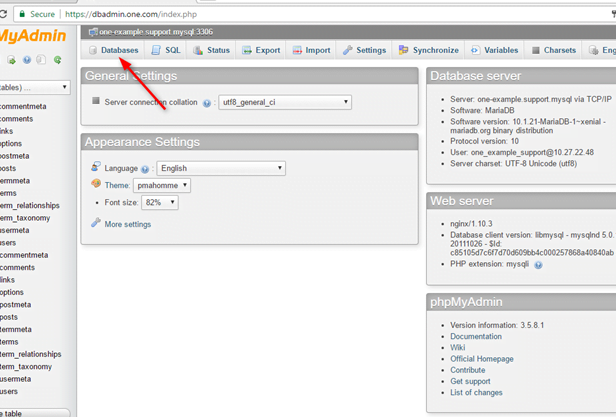
PhpMyAdmin is a graphical interface, an open-source tool pre-installed with your hosting subscription. You can wade through your database to make preferred changes.
All the data on your website is stored in a database. For example, all your posts and articles, including, the comments are stored by WordPress in a database.
Note- It is not possible to undo the modifications. Be cautious while working in phpMyAdmin.
Step 1. Control panel
- Log into your Cpanel.
- Choose phpMyAdmin.
Step 2. Database selection

- In the phpMyAdmin section, click and choose the database you want to access.
Step 3. Managing your database
You can manage your database on the new window that shows up in phpMyAdmin. To access the individual tables in the database, click ‘+’ sign.
Now that you have access to your database, let us learn how to import the database.
How to import database
Step 1. Choose/ click the name of the database you wish to import.
Step 2. Find and select the ‘Import’ option.
Step 3. Choose the required database file in the ‘choose file’ section. And click on the ‘Go’ option.
Note – this file is necessarily a .sql or .zip file.
Step 4. Finishing
At this point, the import should be over. You will see a message on your screen, verifying the import.
There should be tables in the column to the left in phpMyAdmin, confirming a successful import.
Now, it is important to backup your database if your website is using a database.
Let us look at how to back up this database with these following steps;
How to backup the database
Step 1. Click on the name of the database you wish to export.
Step 2. Click on the ‘Export’ option.
Step 3. Choose ‘Custom – display all possible options’
Step 4. Select the tables you wish to export. Selecting all the tables is recommended.
Step 5. Scroll down to Format- specific option and find ‘Object creation options’. Check the box next to ‘Add DROP TABLE/ VIEW/ PROCEDURE/ FUNCTION/ EVENT statement’.
Step 6. Click on the ‘Go’ option.
The exported tables will be saved as a file, named _.sql. You can always import this file back into the database as required.


Share Your Comments & Feedback